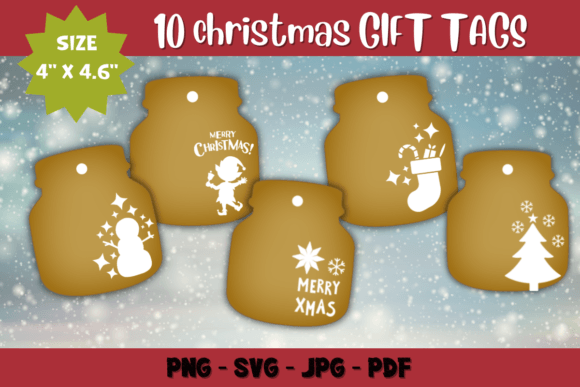
Reviewing 10 Printable Christmas Gift Tags for Embroidery
As a designer who spends more time staring at digitized stitch paths than actual fabric, I have learned that not every pretty graphic translates well into thread. When I first pulled up the 10 Printable Christmas Gift Tags set, my initial reaction was cautious optimism. In the world of Illustrations, these tags look charming on a screen—crisp lines, festive motifs, and a cohesive holiday vibe. But my job is to determine if they hold up under the needle. Can these digital assets survive the transition from a flat PNG or SVG into a textured, dimensional machine embroidery design that adds real value to a handmade product?
The First Impression: Mood and Visual Personality
The immediate appeal of this collection lies in its versatility. The tags are not overly cluttered, which is crucial for embroidery. They possess a clean, graphic quality that suggests they were designed with print in mind, but their simplicity makes them excellent candidates for adaptation into stitch. The mood is warm and traditional without being kitschy. For a craft business owner, this balance is vital. You want your holiday embroidery to feel nostalgic but modern enough to appeal to contemporary buyers.
When evaluating these as potential design assets, I look at the negative space. These tags utilize open areas effectively. In embroidery, negative space is your friend. It reduces stitch count, prevents fabric puckering, and allows the texture of the material to breathe. If you are planning to use these on a tote bag design or a heavy canvas apron, this openness ensures the final finished product does not feel stiff or board-like.
Real-World Application: From Screen to Stitch
Let’s talk about a real scenario. Imagine you are preparing a batch of custom sweatshirt embroidery for a local boutique’s December release. You want to add a small, personalized touch to the cuff or the chest pocket. Using one of the smaller tags from this set as a base for an embroidered patch could be brilliant. Because the designs are distinct and self-contained, they frame well within a 4x4 or 5x7 hoop.
However, there is a catch. Since these are primarily Illustrations meant for printing, they likely lack the inherent stitch structure of a native embroidery file. You cannot simply load a JPEG into your machine. You must digitize them or convert them using reliable software. When I tested a similar conversion process with these types of graphics, the key was simplifying the details. Tiny serifs or intricate snowflake points often turn into messy blobs when converted to fill stitch or satin stitch automatically. My advice? Manually adjust the nodes. Ensure that any text within the tags is large enough to remain legible when stitched out in thread.
For baby embroidery projects, such as bibs or onesies, the softness of the design matters. These tags feature rounded elements and friendly icons. If you digitize them with a light stitch density and use soft rayon threads, they become perfect for delicate fabrics. Just remember that babies move, and their clothes get washed frequently. A well-digitized version of these tags, backed with proper cut-away stabilizer, will withstand the laundry cycle better than a dense, poorly converted graphic.
Navigating Fabric and Hoop Constraints
Not every surface is created equal. While these tags look great on paper, applying them to textured or stretchy fabrics requires caution. If you are working on a custom apparel piece like a fleece jacket, the pile of the fabric can swallow small details. In this case, I recommend using an applique design technique. Cut the tag shape from contrasting felt or cotton, then use the digitized outline of the tag to secure it. This preserves the crisp edges of the original illustration while adding a tactile, professional finish.
Curved surfaces present another challenge. If you are embroidering these onto a cap or a curved pillow cover, distortion is your enemy. The flat geometry of a printed tag might warp when stitched onto a dome shape. To mitigate this, keep the design size modest. Avoid placing large, complex tags near the seams of a hat. Instead, use the simpler, icon-heavy tags from the set for front-panel placement. Always test on scrap fabric first. Check how the thread colors interact with the fabric texture. A dark navy sweatshirt might require lighter, brighter threads to make the design pop, whereas a cream linen kitchen towel might benefit from deep greens and reds for contrast.
Enhancing Brand Value and Customer Trust
Why go through the trouble of converting printable tags into embroidery? Because perceived value. A printed paper tag is nice; an embroidered tag on a reusable tote or a high-quality blanket signals luxury and permanence. For an Etsy seller or small shop owner, this distinction can justify a higher price point. It transforms a generic item into a personalized gift that feels bespoke.
Consistency is also key. If your brand relies on a specific aesthetic, these tags provide a cohesive visual language. Using them across different products—from tea towels to blankets—creates a recognizable brand identity. Customers begin to associate that specific style of holiday motif with your quality. However, professionalism hinges on execution. Sloppy stitching, loose threads, or misaligned hoops will undermine the charm of the design. Take the time to refine your digitizing. Ensure that jump stitches are minimized and that trims are clean.
Practical Notes for the Designer
Before you commit to a full production run, here are my essential checks for working with this type of asset:
- Check Licensing: Ensure the license for the 10 Printable Christmas Gift Tags allows for commercial use if you plan to sell the finished embroidered items. Some digital art licenses restrict usage to personal projects only.
- Test Stitch Density: When digitizing, avoid excessive density. Too many stitches in a small area will cause puckering, especially on lighter fabrics like cotton or linen.
- Contrast is King: Test your design in black and white mockups. If the design loses its definition without color, it needs simplification. High contrast ensures clarity from a distance.
- Stabilizer Selection: Match your stabilizer to your fabric. Use tear-away for stable woven fabrics and cut-away for knits and stretchy materials like sweatshirt fleece.
- Hoop Size Verification: Confirm that the scaled design fits comfortably within your hoop, leaving at least an inch of margin from the edge to prevent hoop burns.
In conclusion, the 10 Printable Christmas Gift Tags offer a solid foundation for creative embroidery projects. They are not ready-to-stitch files, but they are excellent source material for a skilled digitizer. With careful adaptation, attention to fabric choice, and precise stitching, these illustrations can elevate your small shop product line. They bridge the gap between digital convenience and tactile craftsmanship, providing a fresh way to approach commercial embroidery during the busy holiday season. Treat them as a starting point, not a final solution, and you will find they add significant charm and value to your work.